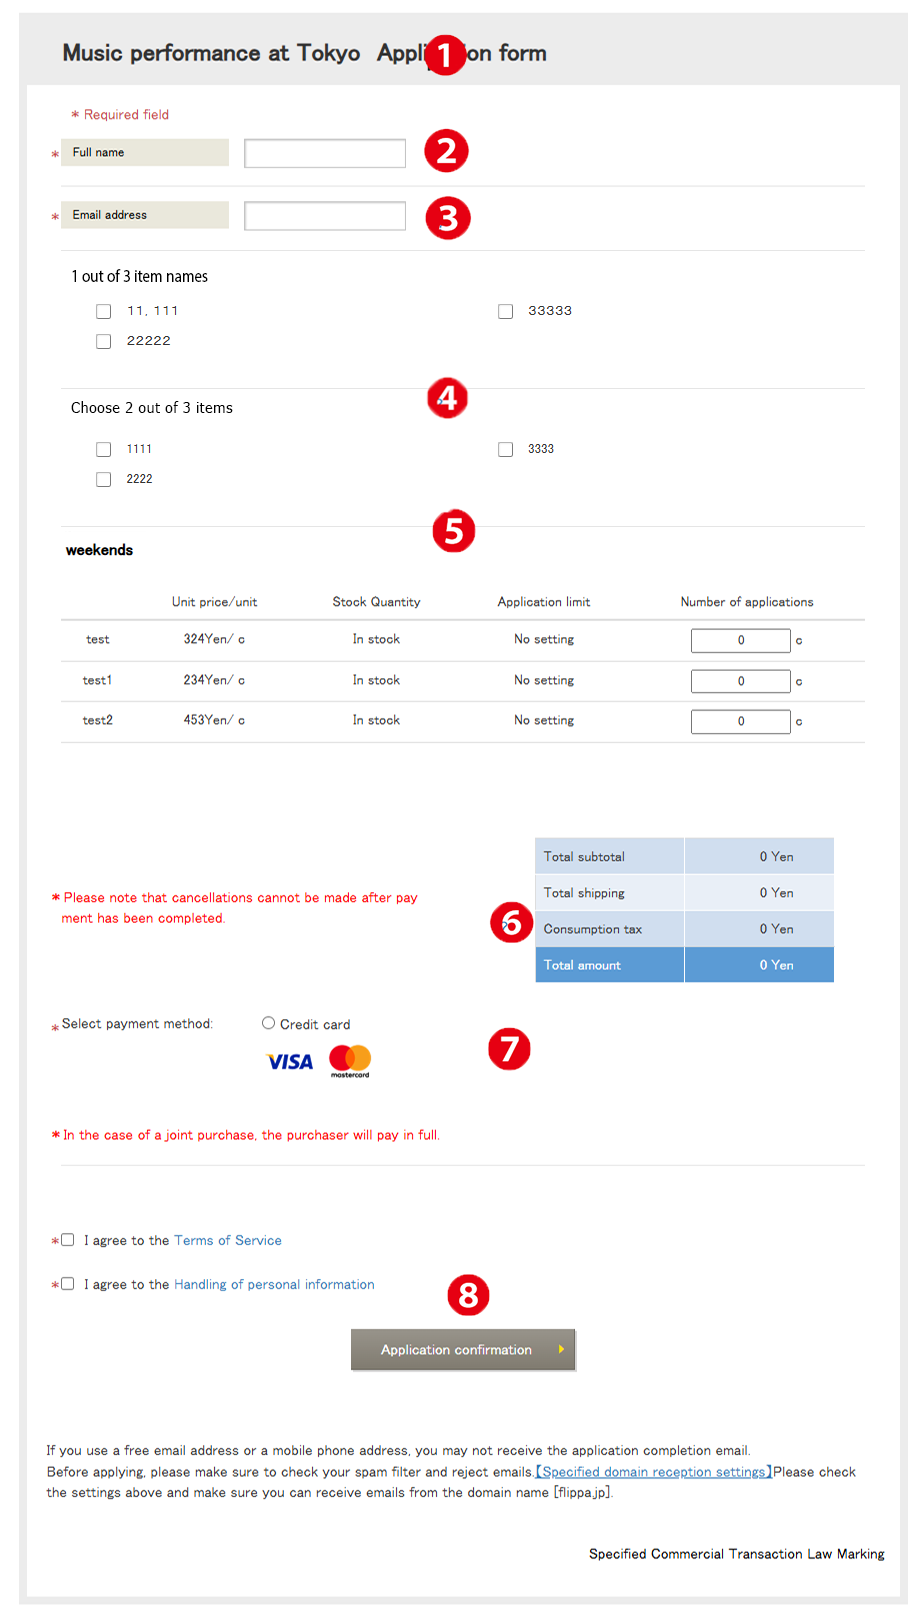
The image on the left shows the application form that will be made public to applicants. It is compatible with both PC and smartphone screens.
❶ Event Name
Registered in “Step 1” when adding a new event.
❷❸ Name and Email Address
In Flipper, each ticket is linked to an owner, making these fields mandatory.
For multiple ticket purchases, the initial setting is to send all tickets to the purchaser in bulk. For example, if three tickets are purchased, the purchaser will receive an email with three attached tickets.
If individual distribution is preferred, you can achieve this by changing the name and email address for each ticket.
❹ Custom Fields
You can freely configure the content you want the applicant to input in “Step 2.“
❺ Tickets
Set up tickets in “Step 2” under “Ticket Settings.”
❻ Fee Summary Table
Displays the total application amount.
❼ Payment Methods
The following four payment methods are available:
❽ Application Confirmation
Redirects to the form confirmation screen.
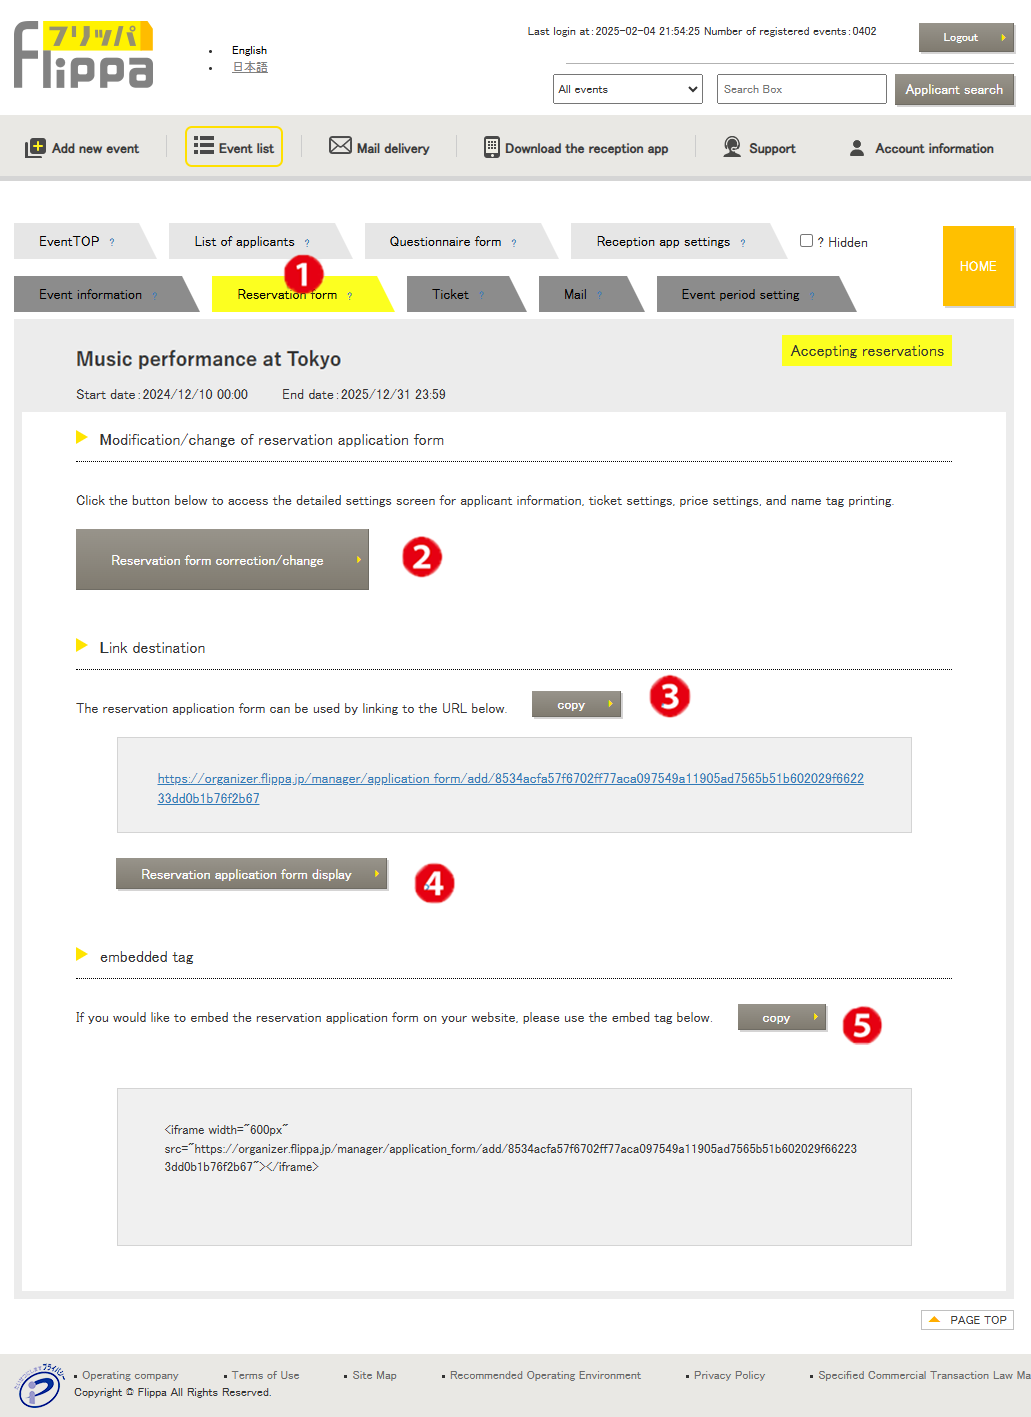
How to Publish the Reservation Form
❶ Reservation Form
Once the reservation form setup is complete, you can edit its content on this screen. Ticket information is also included in the reservation form.
❷ Edit/Modify Reservation Form
Redirects to the settings screen for applicant information, ticket settings, fee settings, and name tag printing.
❸ Copy
By pressing the button, the URL of the reservation form will be copied. You can share it via email or use it on a website.
❹ Display Reservation Form
By pressing the button, the reservation form made public to applicants will be displayed.
❺ Embed Tag
If you wish to embed the reservation form in a webpage instead of using a link, you can use the provided tag.

